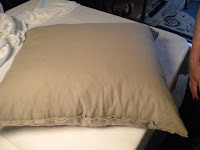
The burlap is a pretty wide weave, so I knew I had to make a lining before I stuffed. I found some khaki/green cotton at my mom’s that I knew would do the trick. I didn’t even measure. I cut a piece of fabric the same size as the bag (using the fold so I only had to sew 3 sides). This wound up creating a ½" seam allowance so the lining was just smaller than the bag. I sewed around the sides leaving about a 4 inch gap at the top for the fluffy stuff.
Onto stuffing. I found a down body pillow from days of old in my parents’ attic. I made a quick snip at the corner and made a trip outside (these feathers are no joke). My mom and I shimmied and shook until the lining was full. It took the two of us to finish this linig. My mom held back the feathers while I sewed the top closed. I sewed, back stitched, sewed, and back stitched because I’m scared to death of what could happen if this thing blows. Think pillow fight on tv, trapped in a studio apartment.
I dropped the new pillow inside of the burlap bag, and it fit absolutely perfectly! I took a needle and upholstery thread and hand stitched the bag closed. Since there was already a seam there, it was easy for me to stitch on top of it which hid my handiwork.
One of my crafting pet peeves is when people make something and say it was free, or only a few bucks because they found everything conveniently at home. Well, sorry but that’s exactly what I did here. I was lucky enough to find cotton lining, thread, and a down pillow at my mom’s house, which made the extra supplies sum to a grand total of NADA! The only cost was the $5 I paid for the bag.
The original plan was to snip off the handles, but I left them and I really like it. I may add a tarnished vintage brooch to the corner, but it’s ready to go as is. Hope you like it! I think it will look amazing on the new bed I am having delivered this weekend. More on that later…


No comments:
Post a Comment